Another title for this edition of the coach blog could have been “The key to keeping your RV road worthy and safe”. My wife and I entered the RV world with our eyes wide open. We had friends and family that have owned and still own motorhomes and we weren’t entirely new to the camping world since we had owned a StarCraft popup camper many years ago.
When we contemplated purchasing our current RV, a 2013 Jayco Greyhawk, we decided to have the coach professionally inspected. That choice would put our mind at ease about having to be hit with surprise repair bills in the near future. The inspection revealed some aspects of the coach that would need attention before winter set in. Overall, our choice in purchasing the coach was bound by the scope of wanting to be on the road in 2024 and not in repair mode.
For the most part our decisions were spot on. One surprise hit us soon after the purchase. The water heater did no have a bypass valve installed. That repair will be to the tune of $300 (labor & parts). Another known issue with the coach was the valve stems on the dual rear wheels were not installed correctly where one could gain access to the inner tire air pressure. To fix that issue, which is a safety concern, required taking the coach to a truck repair facility to get this corrected. This problem cost roughly $250 to fix (mostly labor)

When we purchased the coach we were provided 9 years of repair receipts and previous owners names. Having the names of the previous owners has been a great asset since all the previous owners are very open on what they had done to the coach. The coach was mechanically inspected by a truck shop prior to sale from the third to fourth owner (we are the fifth owner). The inspection revealed the brakes probably should be changed in the near future. The fourth owner owned the coach for a few month before selling it to us so they did not put the investment into the coach for new brakes.
Getting ready for our trip west in the Spring of 2024 we decided to get the coach mechanically inspected again, more so for road worthiness, since we are apprehensive about having to have emergency repairs far away from home. The brakes were found to be needing replaced on all four wheels with the rear brakes needing rotors, pads and calipers and seals. This ‘news’ was not a surprise to use and while I am capable of replacing brakes on cars I stopped monkeying around with that kind of work many years ago so my local truck shop is doing the work. I was unaware of the complexity and amount of labor involved to replace brakes on vehicles the size of a Ford e450 Super Duty chassis. I found a YouTube video that details the process which seems to be a 4 to 6 hours job for the rear brakes. While the front brakes are less complex that too is perhaps a 3 hour job.
Other work being done;
- Oil change and filter
- Transmission fluid change
- Differential lube inspection
- Chassis lube
- Coolant system inspection
When all was done, the bill came in at nearly $4k which was a bit of surprise since our budget for this work was $2k. On a good note, the mechanic believes everything about the vehicle is in great shape.
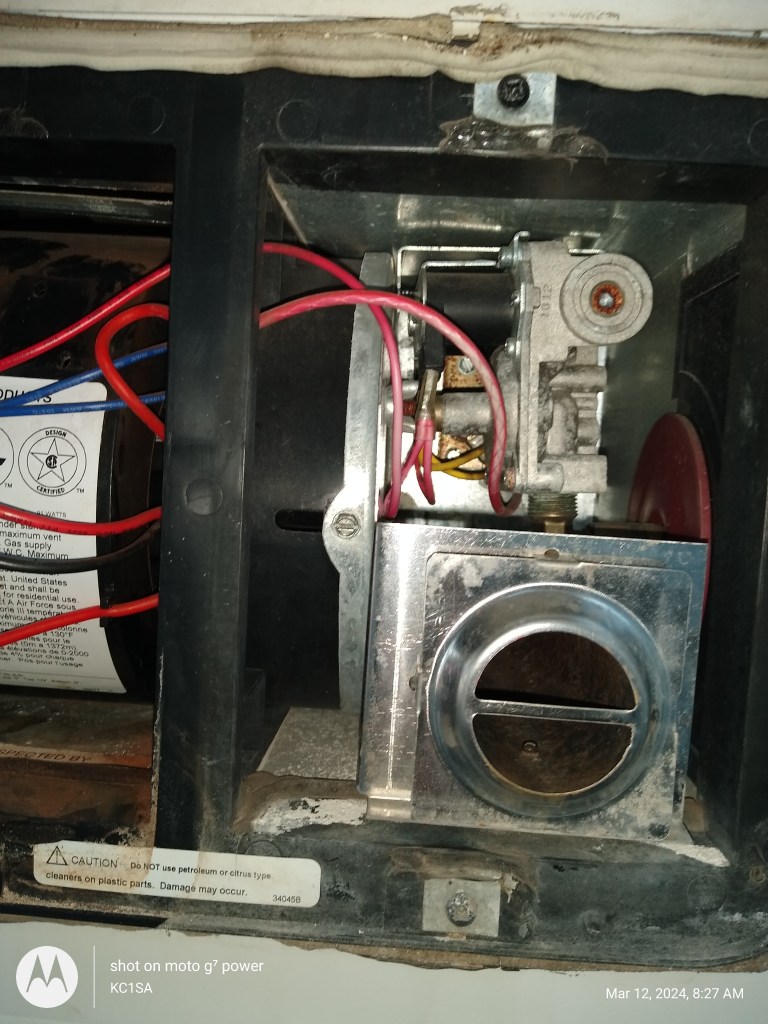
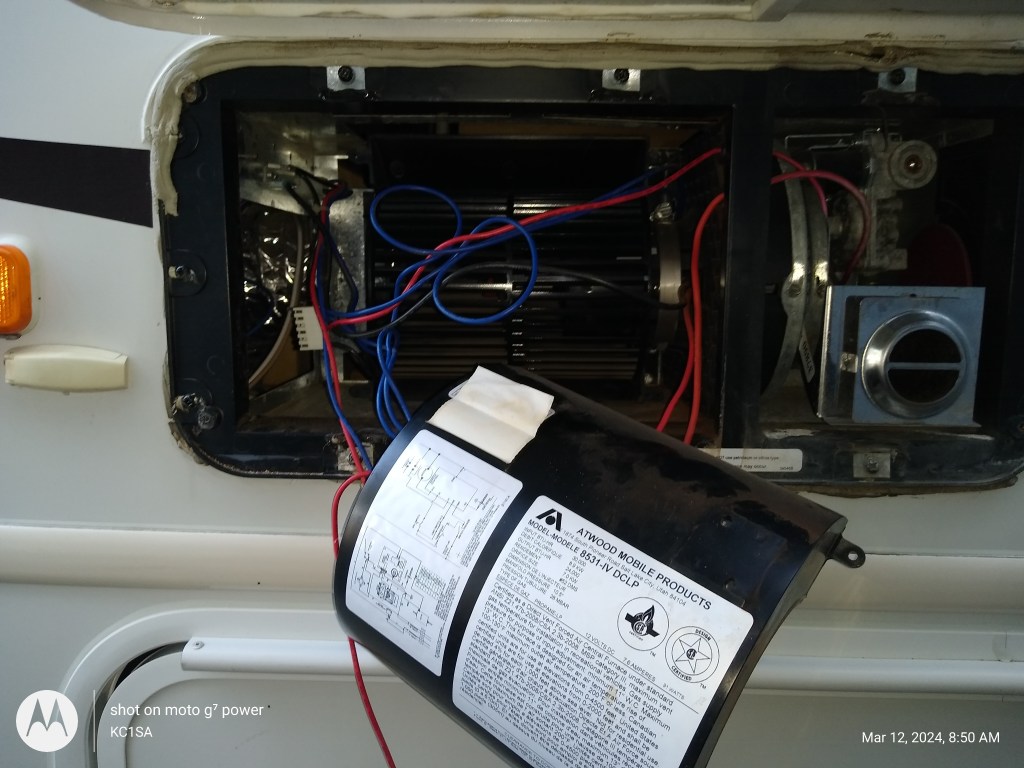
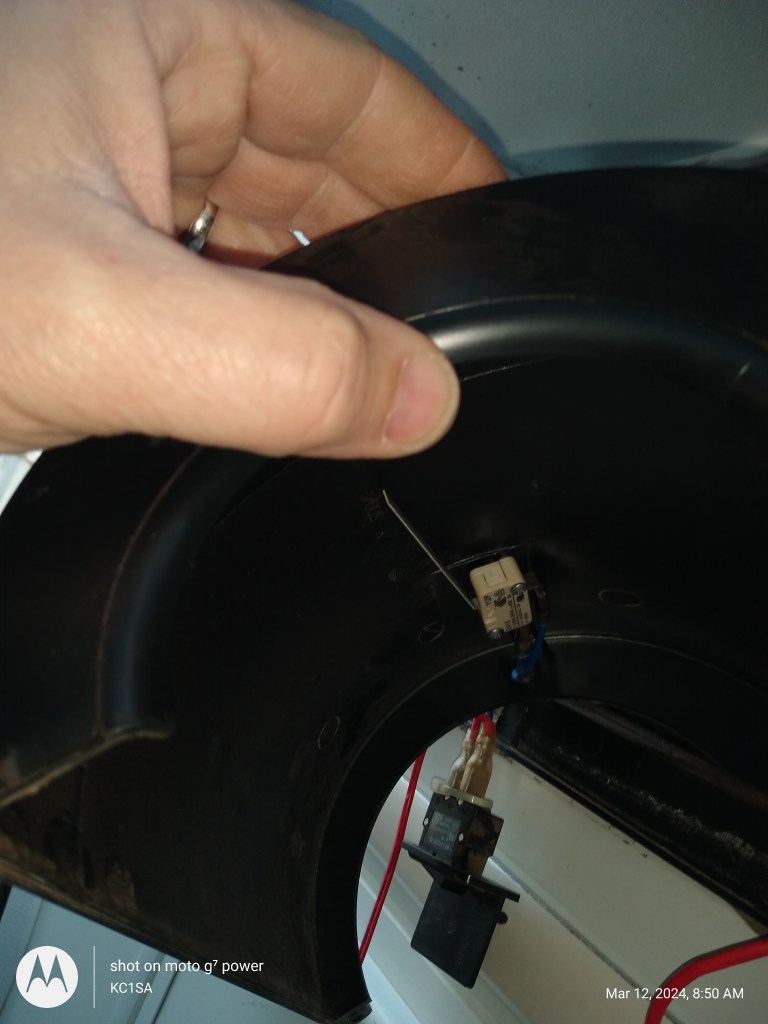
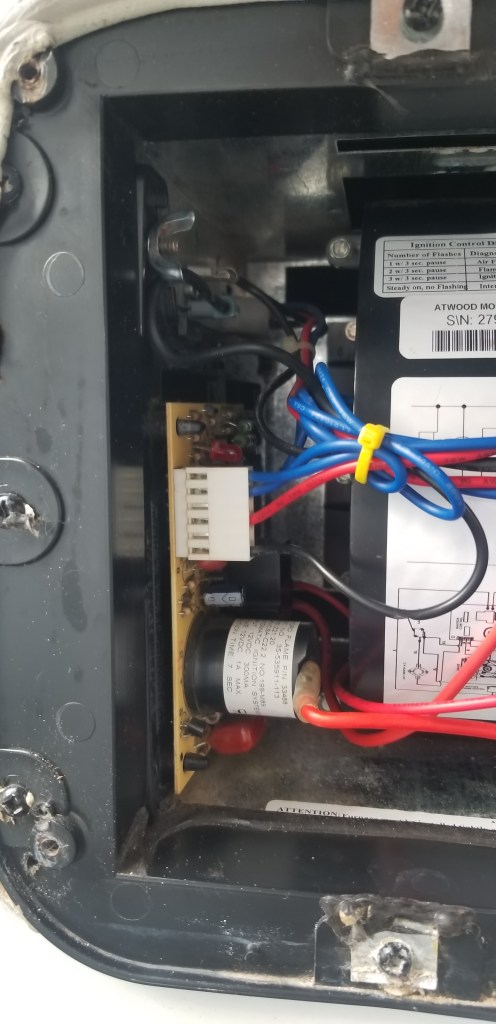
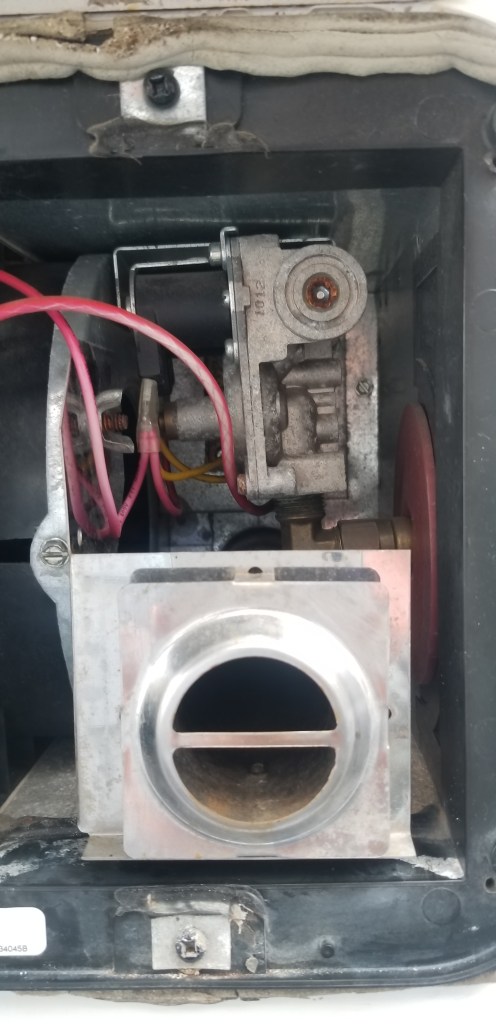
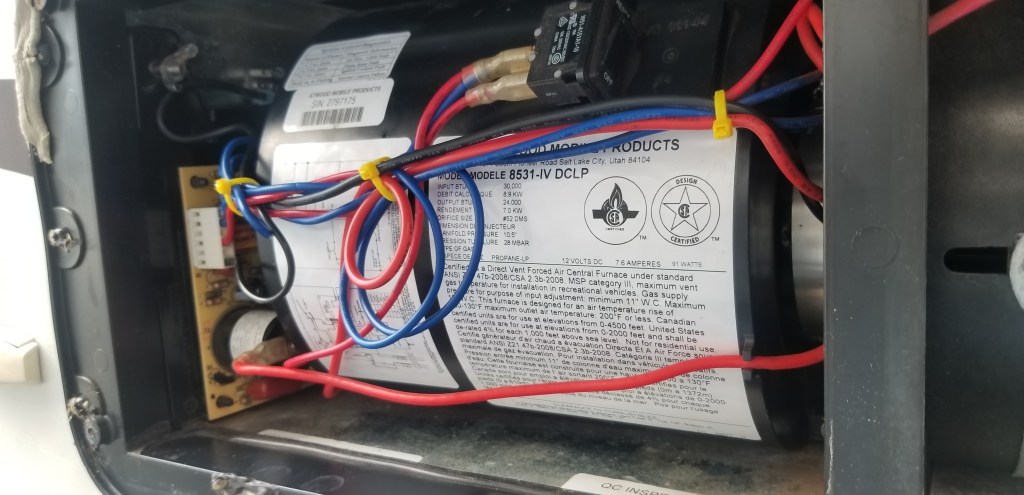
The next work that I can perhaps take a crack at is the intermittent nature of the furnace. Travelling in April and May in the Northeast can have some chilly nights, so having a heat source is pretty important. The coach’s furnace, every so often, would indicate an air flow issue. After reading a bunch about the Atwood 8531-IV furnace it seems the sail switches are problematic and fail prematurely. These microswitches provide feedback to the furnace controller that air flow is moving before the controller ignites the propane for heat. After a bit of debugging, with the help of YouTube, I found the sail switch was electrically open. I disassembled the fan blower assembly and controller to gain access to the microswitch. What I found is the switch was electrically open in either position.
Off to Amazon I went and ordered a new sail switch, actually a two pack, for under $15 and these should be arriving in a day. The furnace is amazingly quite clean and dirt free, previous owners probably didn’t use the furnace a lot else I would see dust build up on components in the blower area. I did find a Beef Jerky pamphlet from the Texas area and shot an email off to one of the previous owners to see if they were missing some memorabilia from trips to Texas.
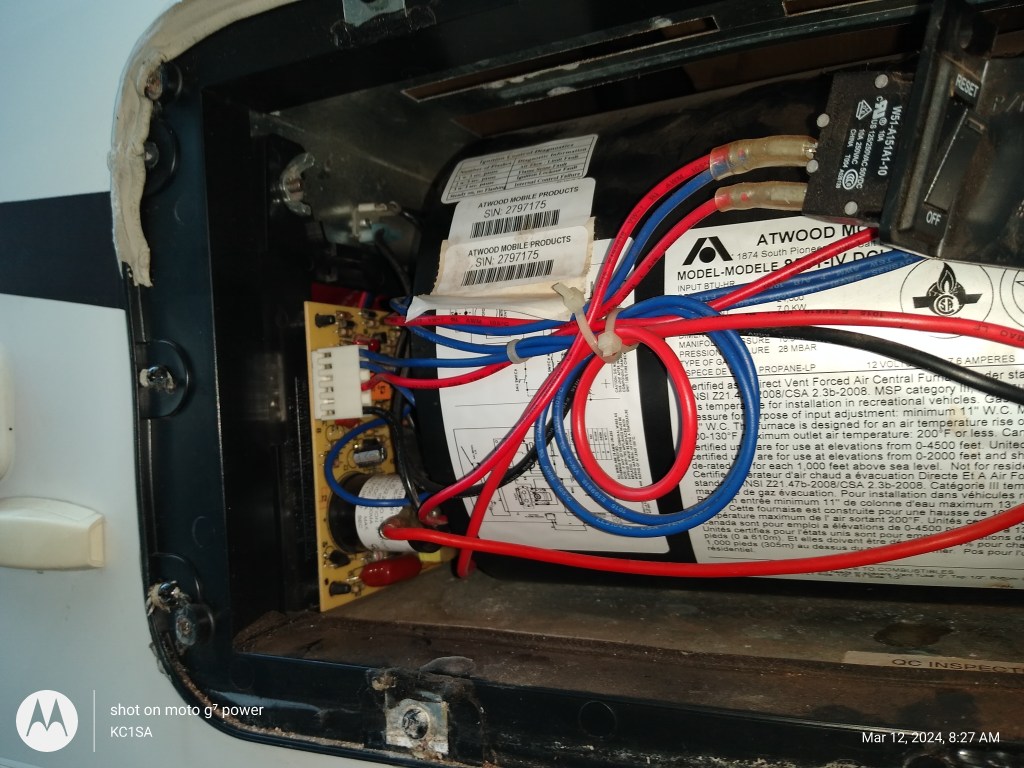
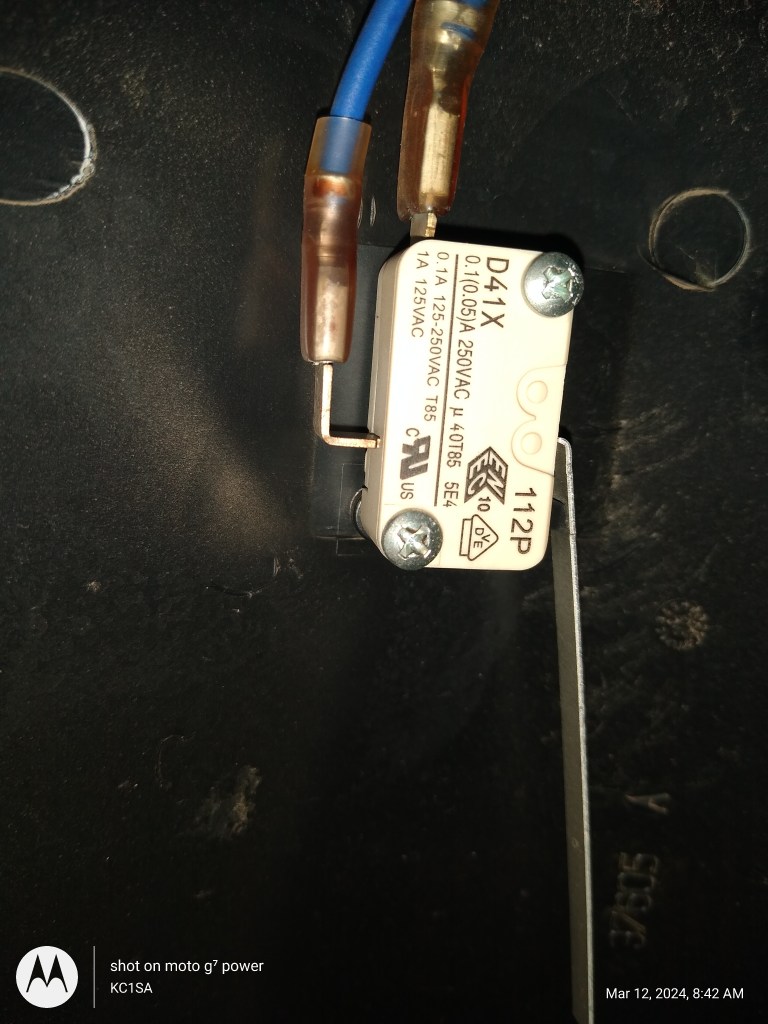
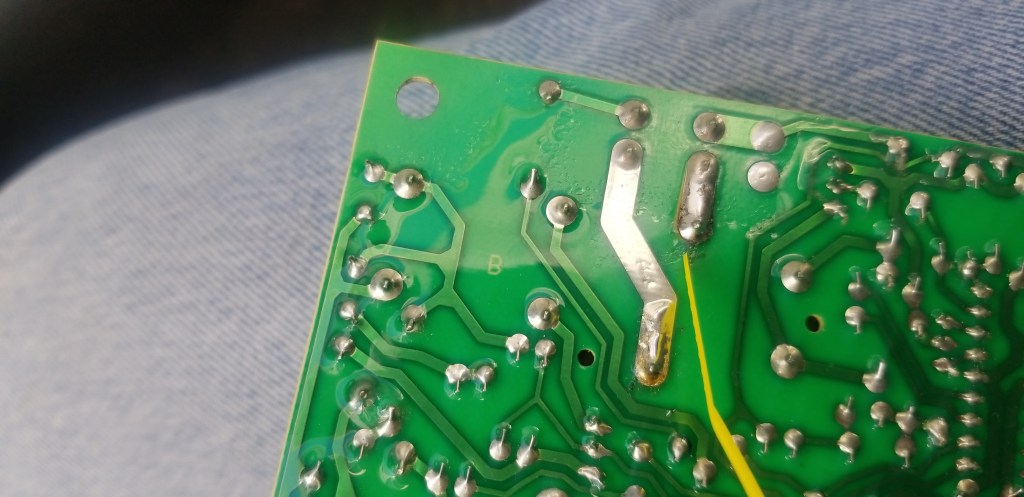
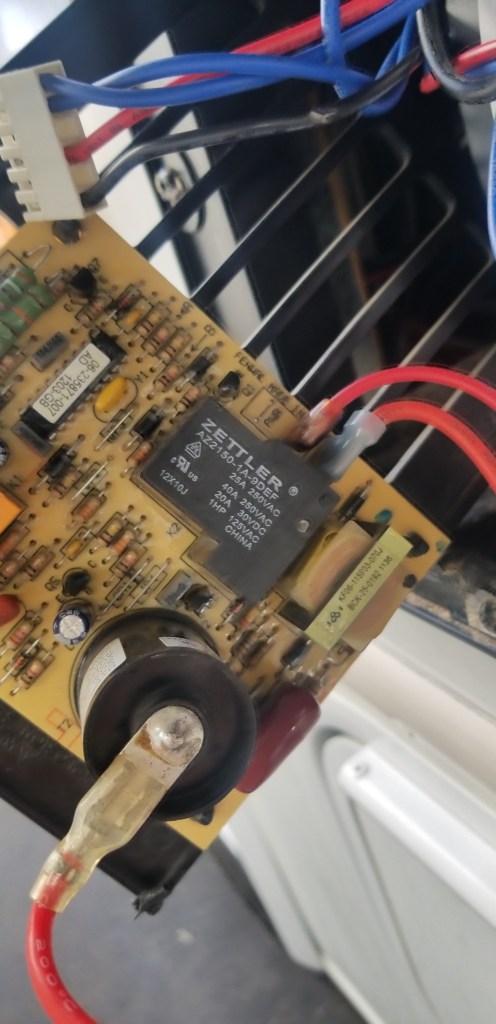
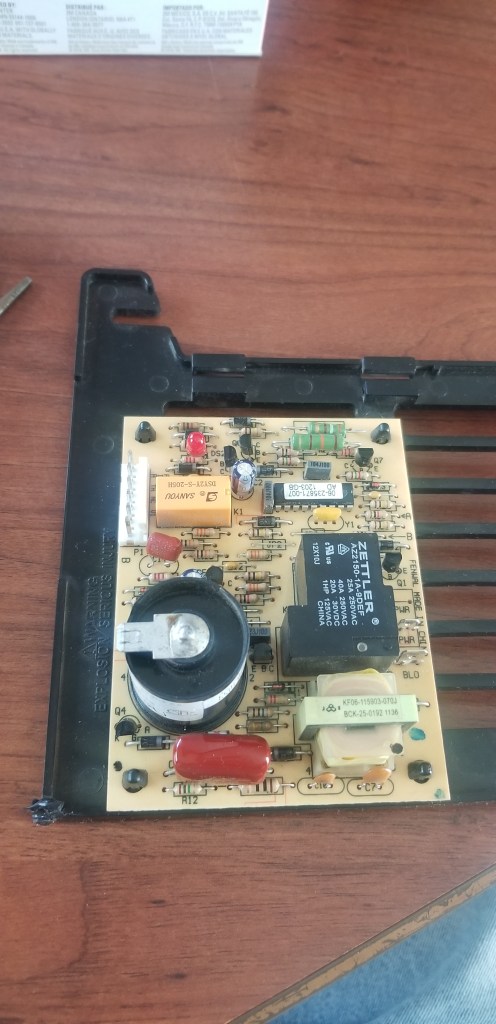
The sail switch solved one of the problems with the furnace, now the blower motor starts up when the need for heat is called for by the thermostat. An issue was still present and further investigation found the controller circuit board had bad solder joint on one of the relay leads (Zettler relay). At first I thought the relay was defective or worn out over it’s life time. That can and does happen to relays, the contacts become worn or corroded by the thousands of make and break contacts it has to make starting and stopping the blower motor. Debugging the relay I found that 12VDC was present on the blower spade on the PCB when heat was called for when the blower motor was not connected to the spade. When the blower motor was connected to the spade (when 12VDC was present) the voltage dropped to 0.1VDC. So either the relay was bad or the motor was bad, but having a bad motor would probably blow the safety fuse which it did not. American Zettler is a good relay manufacturer with a 100k contact closure rating so it could’ve been the relay but I still had my doubts that the relay was actually bad. I purchased a replacement controller card off Amazon for under $60 and while awaiting for it’s arrival I removed the card from the mountings and inspected the board. Upon further inspection I found one of the relay contact leads had a broken solder connection to the PCB. This is a common issue with single sided cheaply made circuit boards (aka PCBs), so I broke out the soldering iron and reflowed the solder around the suspect connection and replace the board into the furnace. Bingo! The furnace now works like new and now I have a spare controller card (Amazon finally delivered) and a spare sail switch.
The conclusion of owning a motorhome comes at a price. Rule number one; you have to be handy else having all maintenance and repair work done at a shop will cost you a bunch of money. An example is my coach’s furnace issue: The sail switch cost about $15 and 30 minutes of my time and diagnosing the bad solder connection another 30 minutes of time. I inquired at my local RV shop and the minimum repair for fixing my furnace was $250 not including parts (and they would not have repaired the controller card but would have installed a new card at a cost of nearly $200! So me doing the diagnostics and work saved me nearly $500!
We have now owned the coach for nearly 6 months and have not been on the road yet. Maintenance costs have approached $4,000! We did approach RV ownership knowing that it would be expensive to own and operate a motorhome. Our advice to soon to be buyers of motorhomes;
- Budget for a yearly $5,000+ routine maintenance / service budget
- Weekly maintenance / inspection / work – minimum of 4 hours per week
- Trip planning
- road route planning – 1 to 5 hours per trip
- reservation setup – 1 hour pre planning per stay
- Infrastructure
- Medical device power (CPAP machines, etc.) – do you know how these will work
- Cell phone & Internet service while on the road
- Charging abilities of electronic devices while on the road
- Emergency services
- AAA or similar
- Provide a list of where you will be and what route you’ll be taking to your loved ones.
- When shopping for an RV, new or used, always plan for a profession inspection to take place (yes, even new RVs have their share of issues and probably more than an RV that is a few years old).
- Thoroughly understand how all systems function and acclimate your self to living in a coach.
- Set up your RV in your yard and live in it for a day or two. This will highlight what you may be overlooking when you hit the road for real.
- Turn off the AC power from your home and live off coach power whether it be solar, generator or battery.
- Prepare meals while in your yard, which means using the stove, fridge and water supply on the coach.
- Run the furnace and / or Air Conditioning.
- Once comfortable at home living in the coach, graduate to a weekend away. Pick somewhere close to your home and let folks know what you are doing.
- Set up your RV in your yard and live in it for a day or two. This will highlight what you may be overlooking when you hit the road for real.

Leave a reply to Charlie Cancel reply